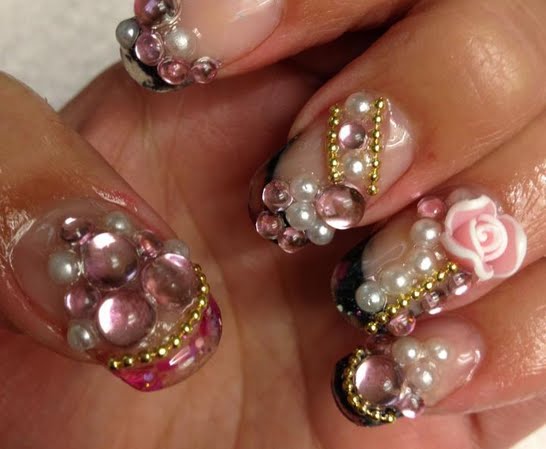
Nail art is gaining immense popularity with women, particularly in the young age group. Women are decking up their nails in different manners for making a style statement. The most interesting thing is that the 3D version of nail art can be seen nowadays and it is needless to say that the thing is quite amazing. 3D nail art can be done on nail extensions as well as on natural nails. Know about How to Do 3D Nail Art.
Table of Contents
Nail art using acrylics and non-acrylics
Acrylics are mainly used in the creating these designs. There is a special technique which is used in creating 3D nail arts. Combination of polymer powder and monomer liquid is used for creating the unique designs on the nails. As soon as the liquid combination comes in contact with air, it starts solidifying. Various kinds of molds are used for creating 3D nail art designs when done with acrylic. However, there are also options of non-acrylic 3D nail art styles. Items like dried flowers, rhinestones, 3D nail stickers, Fimo canes, beads, etc are used for creating different kinds of designs on nails.
 Tutorials for perfect 3D nail art designs
Mentioned below are 2 quite simple, but great looking nail art designs, which you can easily do at home.
Tutorial 1
For this kind of nail art design, the ingredients that are required are as follows:
- Nail polish in skin color or light pink color
- Base coat
- Silver caviar beads
- White nail polish for the French nail style
- Pearl beads
- White ceramic roses
- Toothpick
- Fimo pink flowers
- Transparent polish
- Tweezers
No acrylic paints are being used for this kind of nail art. You might or might not use the base coat in this nail art design. You can directly apply the skin color or pink color nail polish on the nails. Let the coat dry completely. Take the white nail paint and follow the curvature of the nail and apply carefully just on the tips like in French nail paint style. Apply 2 coats of white nail paint on the tips to make it prominent.
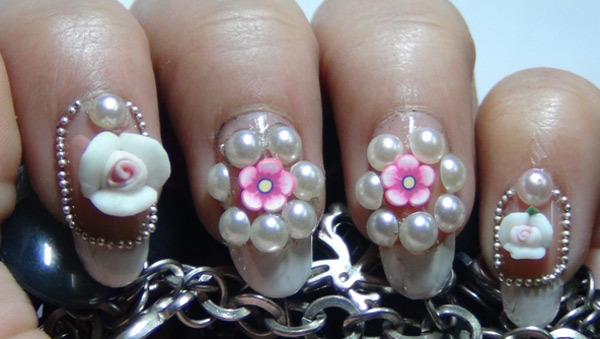
Once they dry, apply a coat of transparent nail polish on the first finger and immediately put a pearl bead right in the top center of the nail. Make a border along the nail with silver caviar beads. Use a toothpick for placing the silver beads. Put a drop of transparent nail paint in the center and put the ceramic white rose there. On the second nail put a fimo pink flower and surround it with pearl beads. Repeat the design on alternate nails or repeat two nails at a time.
Tutorial 2
The ingredients needed for this nail art include:
- Plastic accessories
- Rhinestones
- Beads
- Transparent nail paint for top coat
- Toothpick
- Tweezers
- Nail paints in different shades
First and foremost, apply your favorite colored nail paints on the finger nails. You can use different colors for different nails. Let the coat of nail paint dry completely before you do some nail art. Once the nail paint dries completely, use a toothpick for picking up the rhinestones. Use nail glue or same color nail paint for fixing the rhinestones on the nails. Place the rhinestones in the pattern you like. Once done, put a final coat of transparent nail paint so that uniform shiny look and appearance is obtained.
These 3D nail art tips are quite simple to do. You don’t even need any assistance from anyone for these styles. Wear them to parties or casual occasions and make your own style statement.

